Wonder Wednesday 106: The Positive Side of Drawing Negative Space
Happy Wonder Wednesday 106! Who says focusing on the negative can’t be positive? Not in the case of drawing and painting anyway!
In this Wonder Wednesday draw & paint along project, we’re going to focus on the shapes of the negative space in-between the elements of our subject to help us draw proportionally and paint color relationships.
It’s easy to always want to draw the positive space – the thing we are trying to draw.
Often there is so much information – what our eye actually sees + how our brains process that observation & information + how our hand actualizes it all on the page = very different than what our subject actually looks like.
But if we take time in our drawing and painting to “read between the lines” to look at the space surrounding and in-between what we want to draw, we can actualize the shapes and proportions of our subjects more accurately. This is another technique that helps us to draw what we see rather than draw the symbol of what we see.
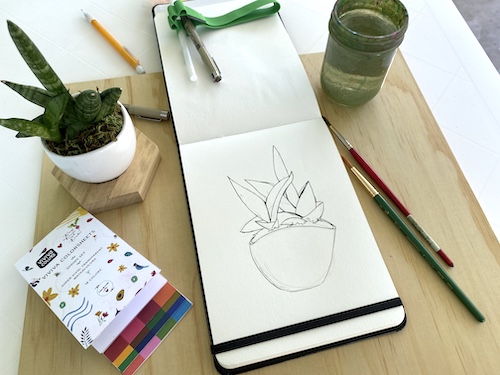
Why do we default to drawing symbols rather than what we see?
Well, the world is full of A LOT of information, so our brains filter all the info for us, process it, and then relate it to what we already know – so we don’t get overwhelmed. But when we nature journal, we get to slow down and really observe.
Relaxed and open, our brains have time to consciously compare the relationships between the positive and negative spaces of what we see. Then we understand, on a conscious level, how to draw our subject proportionally within space. And this concept goes beyond drawing and into the painting and color relationships of our artwork too. Ready to try?
Wonder Wednesday 106:
The Positive Side of Drawing Negative Space
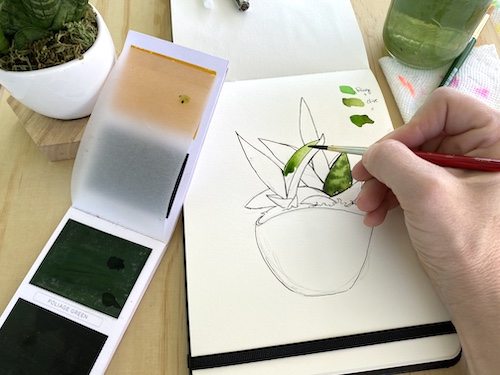
A step-by-step how to draw and paint a succulent using negative space.
In this photo + video step-by-step, you’ll learn how to actually draw and paint using negative space for shape and color.
I show you the progression, but also give you space to draw the subject from the photo rather than me controlling your process. I give you the fishing rod and bait – not the fish (if you will).
Materials
- Paper – mixed media or watercolor
- Pencil & Eraser
- Pigma Micron pen
- A couple paintbrushes (I use 04 & 06 rounds)
- Watercolor paint – I use the limited edition Wings, Worms, and Wonder + Viviva Colors paint set! Click to get yours here while they last!
- A small potted plant, or use the photo provided
- Water & paper towels
Preparation
Set your plant against a plain background that is lighter in color than the leaves so you can see the shape of the plant very clearly. Or use the photo below.
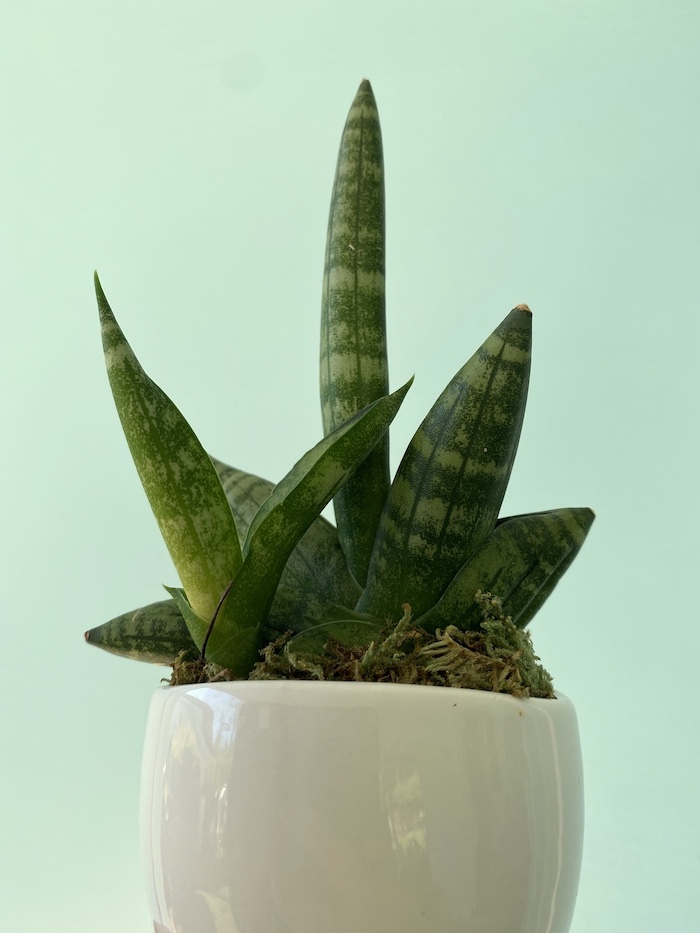
Study the plant carefully.
Observe the shapes and angles on the perimeter of the plant – especially where all the edges meet or intersect.
Notice – what interior shapes do you see in the negative space? Negative space shapes can be closed within the subject or open expanding beyond the subject.
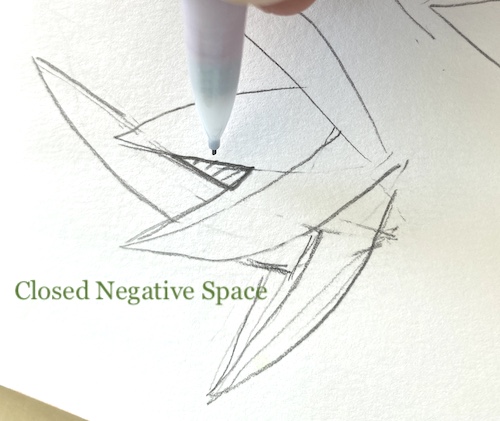
Closed negative space is closed air space within “bounds” of the subject that does not open out into the environment and is surrounded by elements of the subject on all sides.
Open negative space is the space around the subject that opens out into the air and surrounding environment.

Where do you see these two types of negative space in the photo reference?
What shapes do these spaces make?
Procedure
Sometimes, drawing the subject can be overwhelming, but by looking at the empty spaces around a subject, really seeing the lines and shapes can be a bit easier.
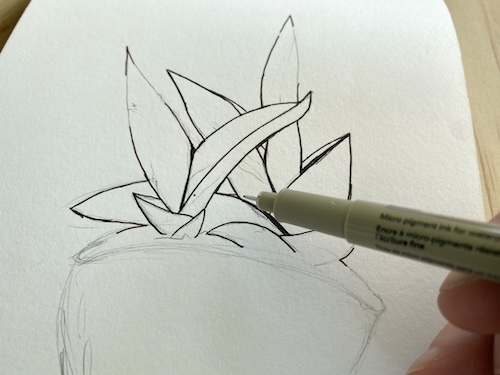
You don’t have to add the pen in until the end or at all if you don’t want to. I just used it to bolden some of the intersecting lines to make it easier to see in the video & photos.
The angles and lines that create the shape of a subject are often really interesting – but easily simplified or rounded out by our brains and hands. When we draw the negative space in the areas where aspects of a subject intersect, it is easier to preserve these interesting angles and shapes.
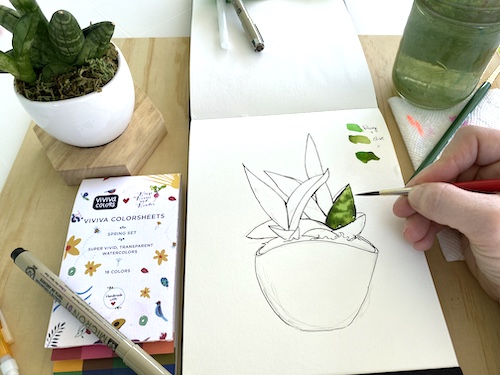
In the video when I paint, I touch on looking at the colors on the surface of the plant as dark and light color blocks of negative and positive spaces.
This works for painting this particular plant because the leaf variegation of lighter and darker greens is very graphic, blocky, and textural. The (positive) lights “pop” off the (negative) darks, but we actually paint the dark shapes to allow the light shapes to shine through and appear “on top”.
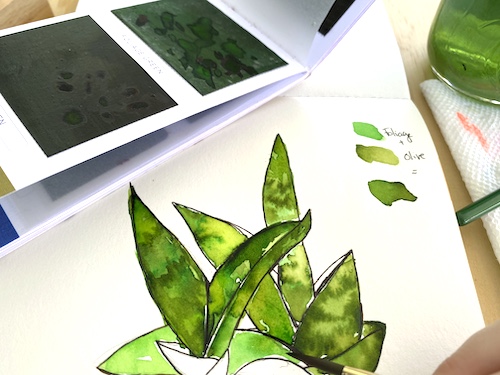
And while even on a plain green leaf there could always be graphic highlights or shadows, most leaves have more of a fade than hard edged shapes like the Sansevieria we draw here. You probably wouldn’t really use this type of positive/negative language when talking about color blocks in a traditional way.
Normally positive and negative is used to describe the actual shapes and lines relationship. But it works here in this particular case.

Check out this video I made explaining the concept of using the negative space to draw and paint. This should help you think about the shapes surrounding your subject as a tool for actually drawing your subject.
The progression I use in the video is:
- Observe
- Draw in pencil
- Trace the lines in pen
- Paint
Watch the video all the way through and then create your own nature artwork, or pause the video and draw and paint along with me – Or – watch it through and then go back and draw & paint along!
Did you notice…
How once your subject is painted, the closed negative spaces really shine through.
These sharp enclosed negative space areas are just as much a part of the subject as the positive space (the actual “thing” you are drawing and painting).
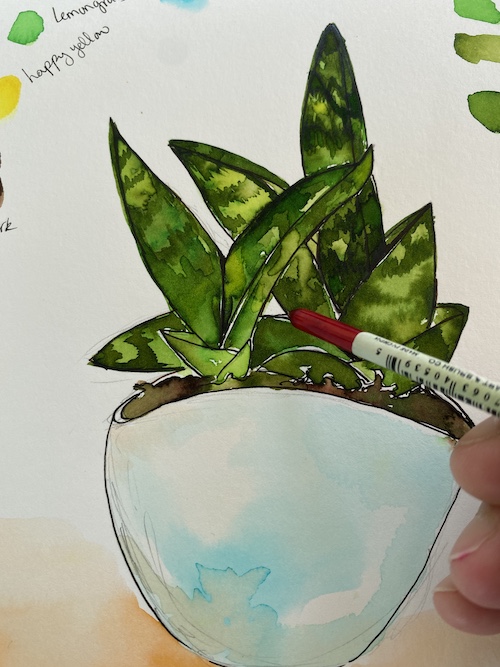
Also notice how keeping clean lines and sharp angles bordering the open negative space makes your image pop off the page. These clean lines and definitive negative space shapes are what helps an art image seem confident.
Extensions
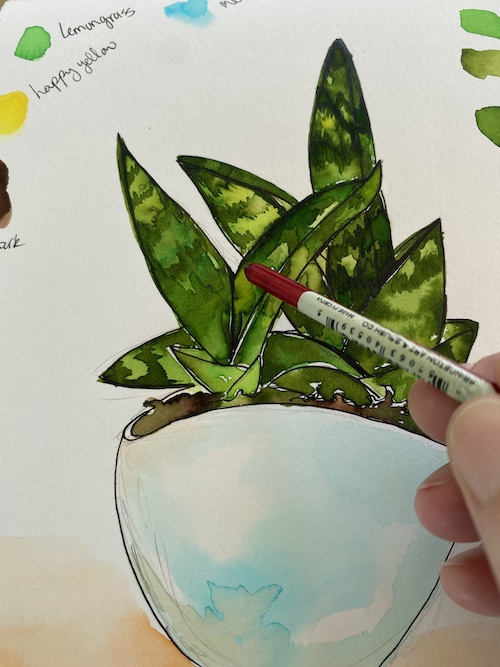
A few more finishing details on painting the pot. The pot was shiny white, and I was in a blue environment, so as a way to paint white on a white page, I painted the blue reflected light into the pot, and left the highlights the white of the page.
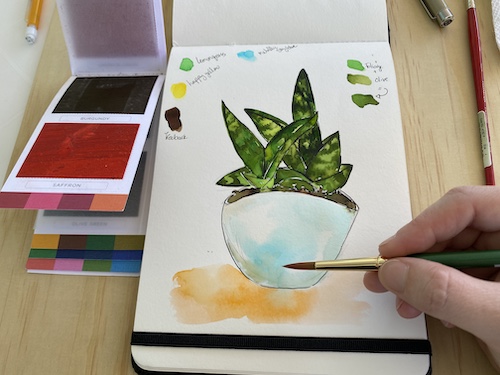
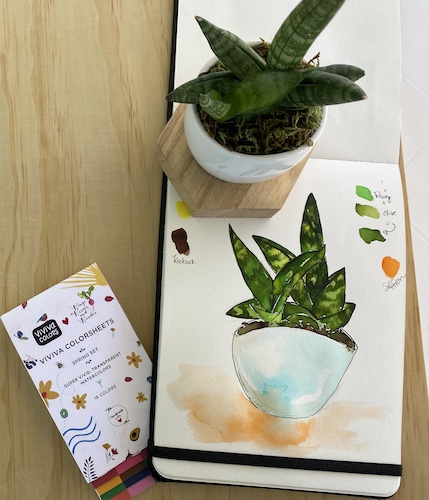
Additionally, the pot was on a wood base, so I use a complimentary orange to represent the wood and then brought some of the orange (diluted) up into the base of the pot where that reflected light color from below acts as a shadow, as well as grounds the pot.
Also, I added some swatches of the colors I used onto the page just for fun. Since my paint set is new, this also helps me remember what colors I used and mixed in this image’s palette so I can replicate the colors again later if I want.
How did looking at the negative space help you draw the positive shapes?
Share in the comments below!
Share photos of your drawings & paintings on Instagram #wingswormsandwonder !
Seeds to Sprout
Order the Draw Yourself Back to Nature Book + the Limited Edition Wings, Worms, and Wonder + Viviva Colors paints Set here! Orders ship by mid June! https://www.etsy.com/listing/1020867259/pre-order-viviva-paint-set-draw-yourself?ref=shop_home_active_1&crt=1
