Wonder Wednesday #1! Seed Balls
Welcome to the premier of Wonder Wednesdays! The last Wednesday of each month I will be posting great lessons and activities to get you and the children in your life out into the garden and beyond. These lessons will compliment the ones in my guide and will cover a variety of topics and age ranges. Sometimes there will even be printable fun sheets drawn by me! OK! Let’s go ahead and get the debut of Wonder Wednesday sparked!
How to make Seed Balls!!
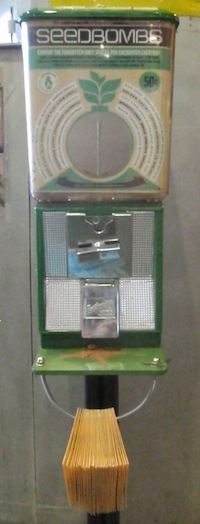
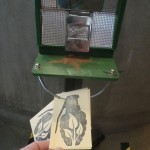
(I got these “seed bomb” dispenser shots at the indie record store Amoeba Music in Los Angeles. I think this is a great gum ball machine conversion! Aren’s the screen printed envelopes super cool too!? I spread my seed bombs in a scrappy little vacant patch in front of the awesome indie craft shop Reform School in LA’s Sliver Lake neighborhood.)
Do you pass by an area that you think would look lots better with some wildflowers growing in it? Is there an area of your yard you would like to plant in but can’t be bothered to pay it much attention? While weeding your garden, are you ever impressed and amazed with how well birds spread seeds through their, well, poop? Do you ever wish you were a seed spreading vigilante yourself? Well, you can be! Let’s make some seeds balls so you can get out there and green up an area for butterflies, wildlife, and not to mention humans.
Seed balls are an easy way to spread seeds in tough areas. By tough I mean areas that are hard to tend or even don’t belong to you. They are great fun for kids ages 3-103 and require few supplies. Before beginning, you will need to decide what type of seeds you would like to spread. Research native wildflower varieties or even hardy veggies like peas and beans that are appropriate for your zone. Choosing the right seeds for the right place is key for the seed balls to be successful. Consider the areas where you want to spread them, how much water those areas get, the time of year you will be spreading, and variables like foot traffic and public mowing.
Materials
A few packets of seeds
Self hardening clay, this can be bought at a craft store (red or gray, not the brightly colored modeling clay) or, if you are in an area with a lot of clay, dug up from the ground for free!
Potting soil
Procedure
Get a hunk of clay the size of a handful or more
Flatten the clay out into a pancake, about 1/4 inch or so thick (These are not an exact science, so the circumference of the pancake can be up to you or dependent on the developmental level of the people making it)
Firmly press a handful of potting soil into the top of the clay pancake
Flip the clay and soil pancake over
Sprinkle a mixture of the seeds you chose onto the clay pancake
Press them into the surface so they do not fall off when the clay pancake is picked up
Fold the clay, soil, and seed pancake in half and then in half again
Knead the clay, soil, and seeds together so they are fairly well blended
Roll the mixture into a ball
Pull off chunks and roll into smaller gum ball sized seed balls
Place all the seed balls on a tray to dry for a few days
Head out on the town and spread your seeds! For best long term results, spread the seed balls in areas that are not mowed regularly – don’t be shy, spread lots of them!
Follow-up
Have the children research what kind of wildlife will be attracted to the seeds they are spreading
Plant a couple seed balls in pots so the children will be able to identify the sprouts and plants coming from the seeds they spread
After a couple months, retrace your route and see if any seeds have sprouted up yet (It can take longer in the “wild” because of environmental factors such as rainfall)
Make extra seed balls and sell them at a fundraiser
Check out this great downloadable seed balls poster created by Urban Habitat Chicago


