Wonder Wednesday 143: From Sand to Sculpture

Sand to Sculpture via Concrete?
Before we make a little homespun nature's concrete ourselves, let's discover what even is this everyday item we call concrete? 1st, did you know that concrete is actually the 2nd most used substance in the WORLD - besides WATER! What?
But when you start thinking about it, makes total sense. My house is made of concrete block, my driveway is made of concrete, the sidewalks in my neighborhood are concrete, we pour bags of it into the ground when we set a garden trellis or fence post, but I can say I never really thought about it - beyond trying really hard not making a mess with it, on it, or of it!
I have always used concrete and cement interchangeably, which I now know is incorrect! What about you?
The word concrete comes from the Latin word "concretus" meaning compact or condensed. Concrete floors have been discovered in ancient Greek palaces dating back to about to 1400 to 1200 BC and Mayan ruins were found to be built from concrete too! This is a seriously important material for humans around the world!
From ancient civilizations to today, we humans haven't stopped building with concrete - so, are you ready to make, and play with, your very own concrete?
What is concrete?
Concrete is a composite material (something made of 2 or more different materials with dissimilar properties) that cures and hardens to a solid over time. It is composed of aggregate (coarse to medium grained particulate material) and cement (which is a fluid binder that sets, hardens, and adheres other materials). In our case in this project, sand is our aggregate and water and cornstarch are our cement.
When an aggregate is mixed with a cement and water, it forms a slurry which is easily formed and molded into shapes. This is one reason why concrete is the most used building material in the world! In this process, the cement reacts with the water in a process called concrete hydration.
Once the aggregate, cement, and water are mixed, they hardens to form a hard matrix that binds the aggregate materials together into a durable stone-like material that has so many uses - from art to construction and beyond! This hydration process is exothermic - which means that ambient temperature plays a significant role in how long it takes concrete to set - explaining why you don't want to pour a new sidewalk in the rain or expect your garden trellis posts to set quickly in a humid environment.
The fact that concrete slurry doesn't harden immediately, allows it to be cast in forms and into a variety of processes. So think sculptures, stepping stones, setting posts and more. When building or sculpting large things with concrete (houses, concrete skate parks, big sculptures) it is poured with reinforcing materials like steel to make it extra strong.
Tips:
* I had to add a lot more cornstarch than the recipe I had called for to get a substance that could hold its form into shapes. So start with the recipe and add cornstarch as needed to make a pliable dough that holds its shape. I don't know the science, but I believe what the particular sand is composed of will make a difference in this case.
* I will say though, the softer substance (less cornstarch), which in the concrete world is called the slurry stage, didn't hold its shape, but could be great fun for sensorial play in a tub with little animals or trinkets. As it cools and air dries it become more structural.
* I baked mine for an additional hour, but I live in a very humid environment, so I imagine it will depend on where you live.
* I also recommend clean up be done outdoors. I doesn't seem like a good idea to rinse the ingredients of concrete down the drain - unless you like inviting plumbers over!
* Finally - I can't yet attest to how long these pots will hold up in the rain or water long term. I can say mine are doing just fine outdoors after a week. So maybe don't build a new house with this recipe just yet!
Wonder Wednesday 143:
From Sand to Sculpture
Materials
Clean sand - minimum 1 cup
Cornstarch - minimum 1 cup
Boiling water - minimum 1/2 cup
Parchment paper
A mixing bowl that can tolerate boiling water
Mixing spoon
Various nature bits and bobs
An oven & baking sheet
Optional - Acrylic paint to decorate
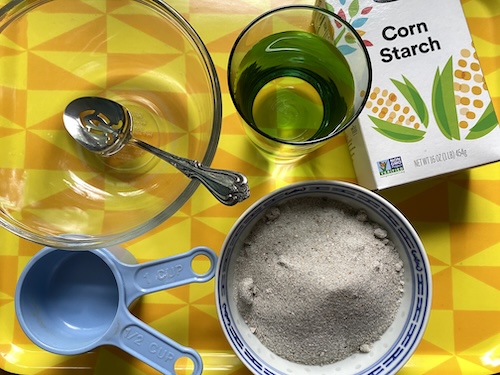
Preparation
Go for a walk in nature and collect sand.
**Be aware of any environmental restrictions if you are gathering wild sand from beaches, lakeshores, riverbanks, etc. You could also use purchased sandbox sand.
You may also want to collect small bits of nature that could be pressed into your nature concrete to make patterns.
Leaves, seashells, sticks all could be fun...

Procedure
Put 1 cup of sand into the mixing bowl.
Put 1/2 cup of cornstarch into the mixing bowl (to start. Depending on where you gathered your sand and the natural mineral composition of it you will likely need to add more cornstarch.)
Add 1/2 cup of boiling water and mix together with the spoon. This is the slurry stage. (At this stage the texture and consistency makes a really fun sensorial play substance.)

Mix the water, sand, and cornstarch together until nice and combined and smooth.
Let cool until comfortable to handle.

Now it's time to sculpt!

Press nature items into the concrete to leave patterns. Try fingerprints or paw prints! You could even make up your own fossil!
If you are making flat items like stepping stones, do it on the parchment paper so you don't have to risk cracking when you pick them up to move them to the baking sheet.

What would you like to make? Small bricks or blocks? Stepping stone art? Pots or vases? Animals or abstract art?
Flatten, roll, press, shape, and create!

Once you are done sculpting, place on a baking sheet.


Preheat and then bake in the oven at 300˚F for 1 hour (or until hard and dry).
Notice the color difference between the wet concrete and the dry.
While sand color may vary, the wet will always be darker. Pre-baked wet is on the left, baked is on the right.
Once hard, turn off the oven and let cool completely on the baking sheet inside the oven.
Once the items are cool enough to handle, if you tap them with your fingernail or silverware they will even make a "tink" sound like concrete!

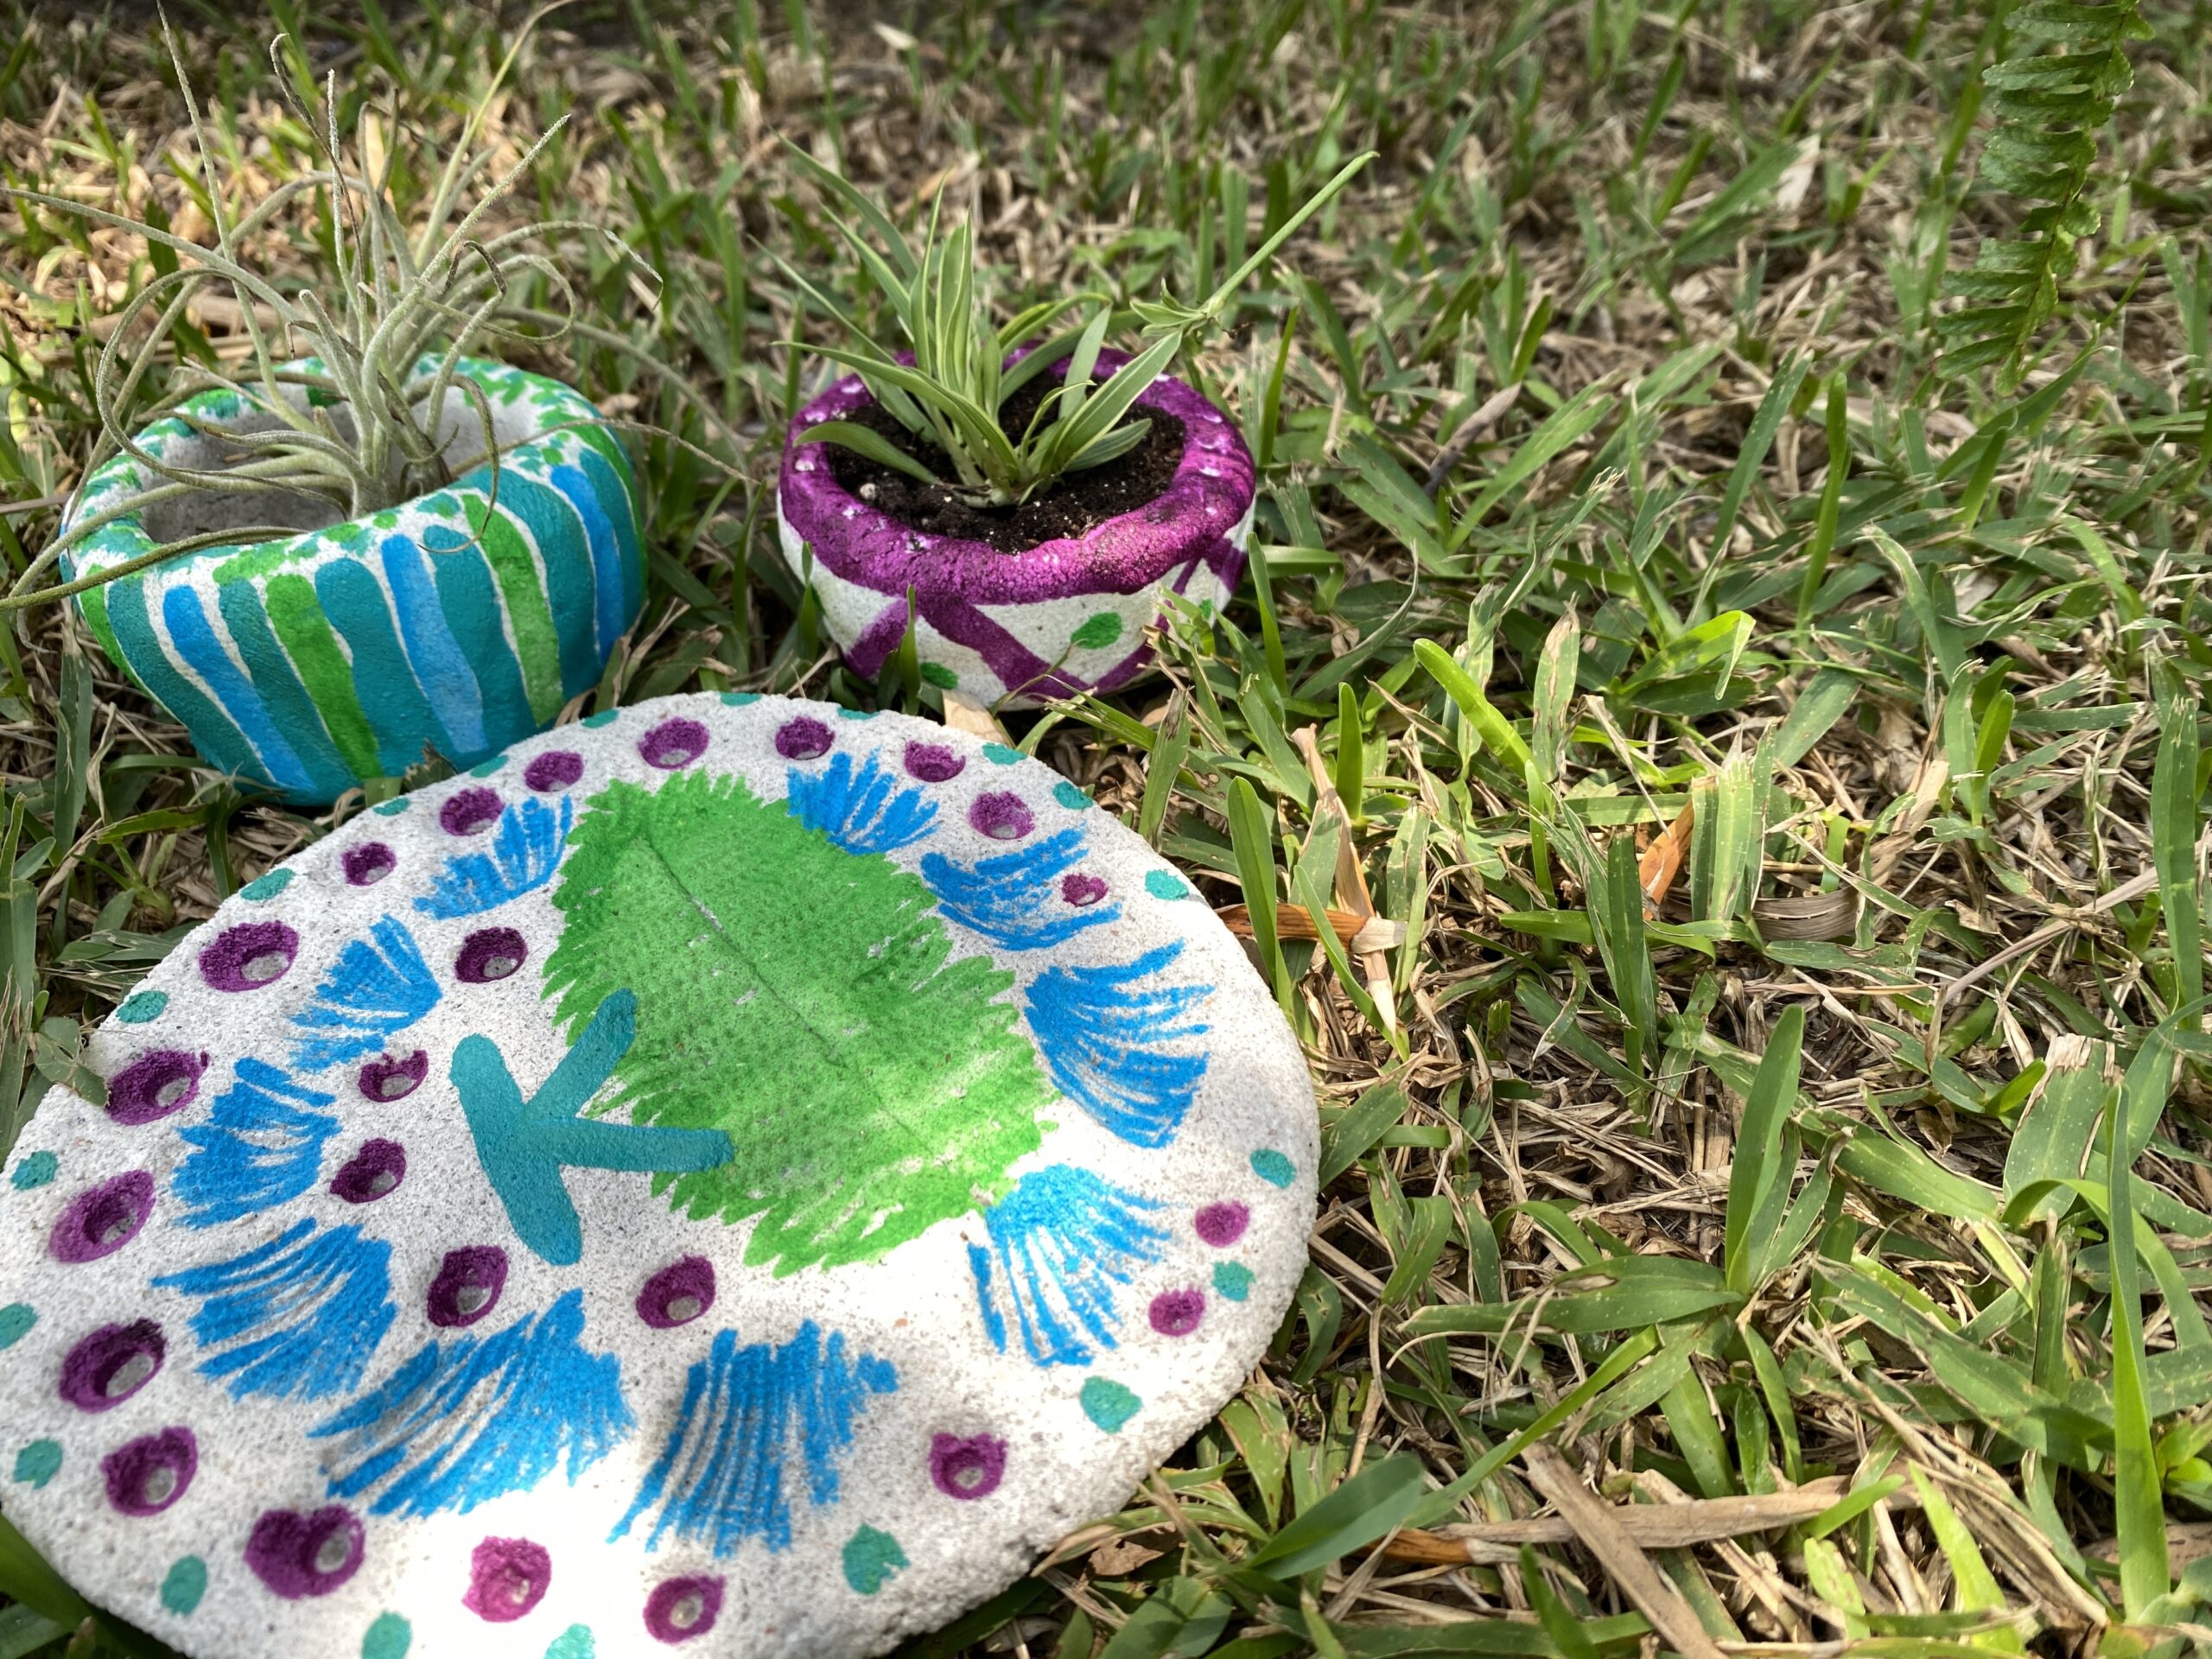
Your concrete sculptures are now ready use and enjoy!
However, if you want to keep going - it's time to paint!

Use acrylic paint to paint your sculptures. I recommend mixing in a bit of water into the paint on your palette so it flows more smoothly across the rough concrete surface.
The more water you add, the more translucent the paint will be. This can create interesting effects, allowing for the possibility of thin color washes and overlaying color effects.

Once you are finished painting, let dry completely.
Then plant, fill, hand, & place your sculptures into your life - indoors or outdoors - to enjoy!
Seeds to Sprout
4 Step Flower Pot
If you are psyched on making pots and want more, this Wonder Wednesday 92 project is for you! Let's make a coil pot! This is technically more of a pot holder, pot in pot, but it's great for seasonal flair & fun!
Quick Spring Sprouting Rings
Need something to plant in that new pot? make these Wonder Wednesday 104 upcycled sprouting rings to get a seed started to grow in your new nature's concrete pot!

Kitchen Propagation
No patience for sprouting seeds, but you still want a new plant to grow in your new nature's concrete pot? Try Wonder Wednesday 70's regrow gardening!
Take those celery bottoms and carrot tops you once tossed and grow them into free new plants!
