To Pick or Not To Pick: a mini-course in harvesting, Part 3, Storing
You now have an understanding of basic more obviously visual harvesting signs and some of the more subtle signs that come from experience. Because of your super harvesting skills, you have more produce than you can eat in a week and your friends will disown you if you bring them anymore__________(fill in the blank with your abundant veggie names).
What to do?
It’s time for Part 3 of the harvesting mini-course, start saving for when pickins are slim!
Putting up , as my grandma says, can be simple or complex, depending on your needs and bounty. I usually take the simple cheaters route because the easy path is hard enough, right?
This is rarely a concern for school gardens as children are thrilled to take surplus produce home, but sometimes it can be canned into take home gifts. We canned strawberry jam in my class and sent home small jars with a little tag and ribbon at Mother’s Day. In the home, school, and community garden, remember to let some plants go to seed and save those seeds for the following year. And/or decorate envelopes, fill with saved seeds, and use as a fundraiser or as gifts.
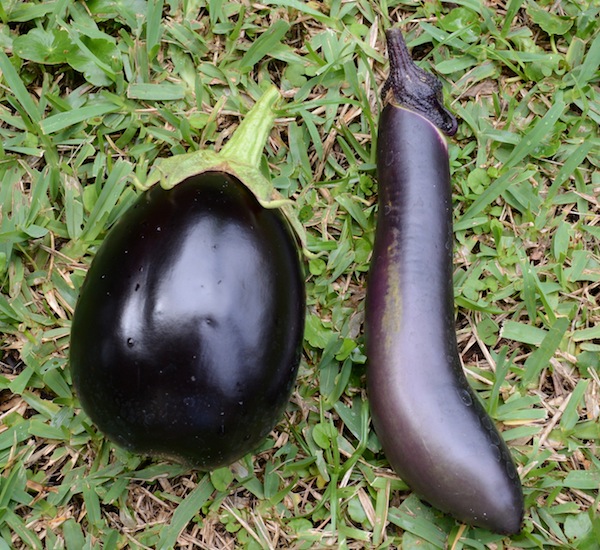
Eggplant can be stored frozen in the same method as beans. Do you know which is the ichiban?
Canning: This is not my specialty by any means. I used to help my grandma sometimes a little with this when I was young, but I never really learned all the ins and outs before she stopped high volume canning. My best recommendation is to take a class through your local county extension agency. They offer great hands-on guided workshops. Canning is especially good for tomatoes, apple sauce, peaches, pears, and even green beans if you like. You can pretty much can any veggie or fruit you like.
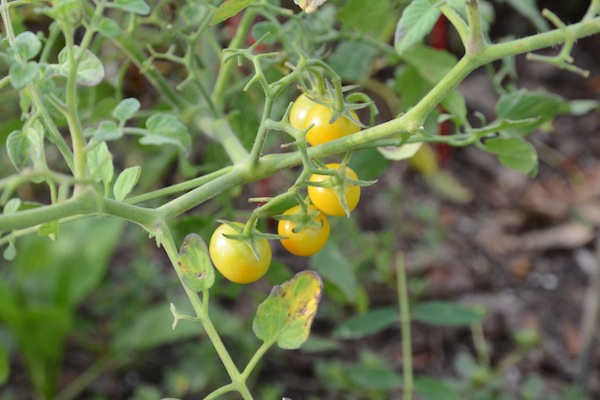
My Grandma’s canned stewed tomatoes were the best!!! She put up enough for us for the entire year. These are a yellow variety of cherry tomatoes.
I can say my easy canning method for strawberry jam is: sterilize your jars and lids in the dishwasher the morning of and put in a sealed clean plastic bin to avoid contamination during transport to school. Make your jam from an easy recipe. Fill the jars and seal quickly. Make sure the lids suck down. After the jars cool and you are positive they have sealed properly according to manufacturer’s instructions, decorate with ribbon and tags.

Freezing: This is probably my favorite method. It is easy and keeps things very fresh because it doesn’t require much cooking on the front end. It doesn’t work well for everything, but is great for fruit juices, beans, greens, and other veggies you plan on definitely cooking or reheating later. Always put the date on the lid or bag of the frozen items to keep track. Things don’t last too long around my house, but as a general rule of thumb, don’t eat frozen food older than one year.
Fruit: This is a super method for those of you with citrus and other juicy fruits. Just juice the fruit the way you normally would, but then fill ice cube trays with the juice, freeze into cubes and store in freezer safe containers. I especially like to do this with lemon juice. We have way more lemons than we can eat in the winter, so I freeze the juice in various size ice cube trays and we have single portion lemons juice for about the next 10 months! Orange juice and bananas never last as long as the lemon cubes, but it is still nice to be able to save some yard fruit for later.
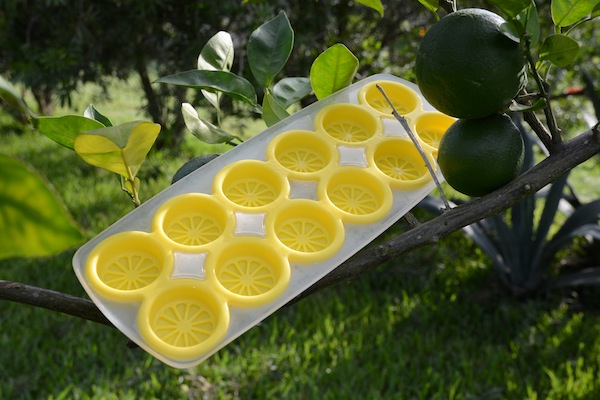
 I love these shallow ice cube trays for lemon juice. They are the perfect size to add to a tall glass of water.
Beans: The first time I did this I had to have my grandma on the phone talking me through it because I was scared I would mess it up, but I quickly learned how easy it is to freeze fresh beans! 1. Shell your beans and rinse in a colander. Keep the colander in the sink ready. 2. Bring a pot of water to boil. Have enough water to fully cover all your beans and then some. You may need to do this in batches. 3. Once boiling, put in the beans, bring back to a rapid boil and boil for 2 minutes. 4. Prepare a large bowl filled with ice water nearby. 5. Pour the hot beans into the colander and then immediately pour the beans into the ice water until cool. 6. Drain your beans again and then put into sealed freezer safe containers and freeze. 7. Remember to put the date on the top of the container.
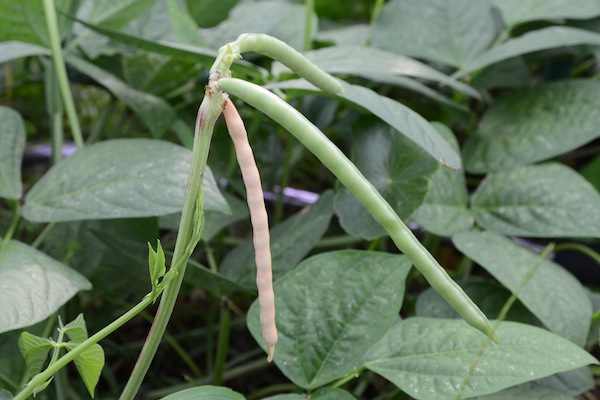
The tan bean is dry and ready for storing, the green pods are almost ready to pick and freeze.
Corn: This is the same process as the beans, basically. Just put the full ears into a pot of boiling water for 2 minutes. Next, put ears into the ice water and let cool completely. Then, cut the corn off the cob and freeze in sealed freezer safe containers.
Greens: Greens are even easier! All you have to do is cook them the way you normally would and then drain and freeze them in sealed freezer safe containers. Simple!
Squash: Cook it the way you like to eat it and then freeze. Just like the greens, when you are ready, thaw, heat, and eat!
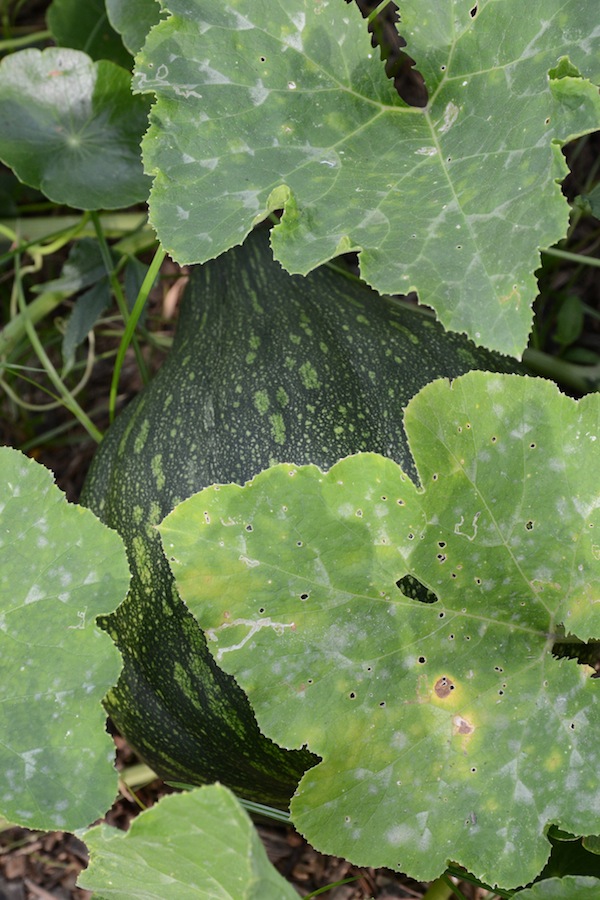
See how even large squash can really hide themselves in the leaves. I just found this one today! Also, notice the 2 types of fungus on the leaves- the yellow spot and the white cloudy powdery mildew. Our wet nights are catching up with this plant, so I will keep a close eye on the nearly ready fruit.
Pickling: This is a fun way to put up lots of things from green beans to cucumbers to watermelon rind to beets. There are lots of recipes for pickling, so check out a pickling recipe book and then check out a pickling class at your county extension agency, or ask your grandma!
Quick Pickles: I learned this one from my sister-in-law the queen of clever thrift! If you buy pickles at the store, save the juice and then slice up some cucumbers, put them in the pickle juice and let them sit between 3 days in the fridge. Then enjoy your quick pickles! Quick pickles do not last as long as regular, so I usually eat them within a week.
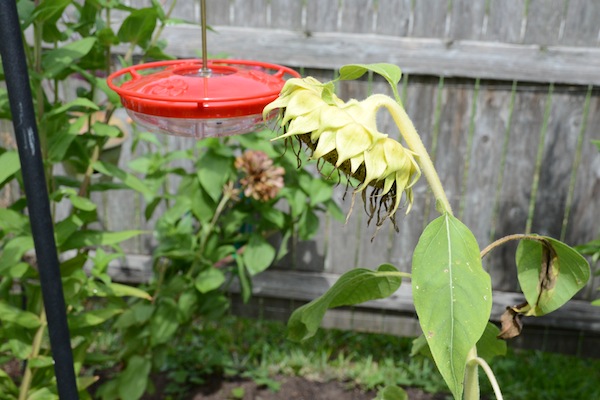
Wait until your sunflower heads turn yellow and then droop down. That’s when you know your seeds are dried and ready to harvest!
Drying: This method is great for beans, seeds, hot peppers, and herbs and may be the easiest method of all. Just leave the bean pods or seed pods (or heads) on the plant and wait for them to turn yellow and then brown drying in the sun. Once dry on the “vine,” harvest and store in an air tight dry container.
For herbs, harvest the plant and hang the stalks upside down until dry and crispy, or for the quicker method, you can pick off the leaves and dehydrate them. This makes your house smell really good!
If you live in a dry climate peppers can dry on the plant, but in humid climates a dehydrator is invaluable.
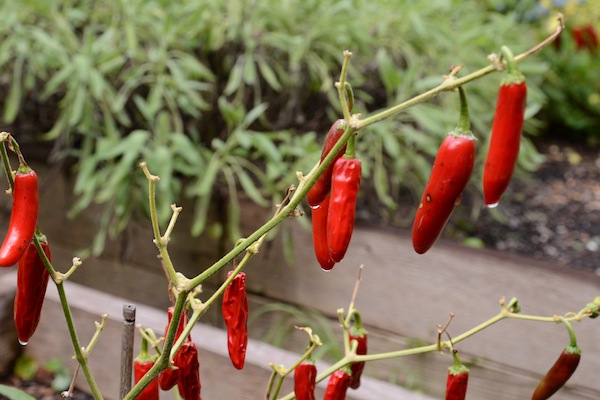
My peppers were starting to dry on the plant because I’ve been a lazy harvester, but see how the black spots of fungus are starting on that one pepper? That is from the wet weather. I need to get those peppers picked asap!
Be sure to harvest dried produce for storing after all dew has dried so the seeds, beans, and leaves are completely dry. I like to do it in the heat of the afternoon after a few dry days to be totally sure.
If there is a call for rain, be sure to harvest dried bean pods before, or the chance for moldy pods increases. They will dry out again, but I feel it’s better not to let the pods get moldy. Also be sure that the drying items are completely dry before you store them. I ruined a batch of dried coriander seed by adding some slightly damp seeds to a nice container of good dry seeds. that was a bummer for sure!
If there is a question of dryness in your harvest and you have a dehydrator, dry seeds out and then store. If you are drying seeds for saving, dry on the very lowest setting, less than 100 degrees, to maintain the seed’s viability.
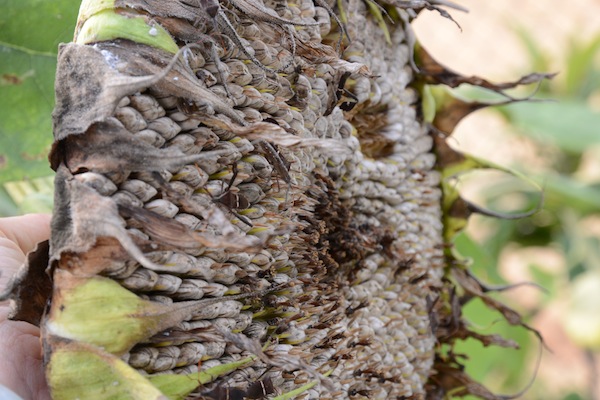
These sunflower seeds are ready to eat, store, save, or a little of all 3! (Can you find the bugs?)
Well that about covers the basics! You are ready for harvest time! The most delicious time of year! I hope this mini series has been a help and that your harvest is more bountiful than ever. The best part of harvest time is sharing with friends, so maybe a potluck is in order! Be sure to invite me!
What is your favorite way to store your harvests? Do you have any tricks or tips? Share them in the comments below!
I want to see what you are cooking from your harvests! Share pics on Instagram #wingswormsandwonder
Seeds to Sprout:
There is an entire category for sweet pickle canning recipes on Pinterest!! Check it out!
Learn organic Gardening Magazine’s Top 10 Tipd for storing seeds
Want more ideas? Check out this Simple Bites blog post with 12 recipes for very specific storing from raspberry honey butter to roasted tomatoes in oil! Wow!
You can even plan your next potluck online with one of the many potluck planner sites like Perfect Potluck! Crazy hi tech! You’ll never have a potluck of all, or no, deserts again! (Secretly a pot luck of all deserts would be my dream!)
Be sure you are signed up for the newsletter by 10pm tonight if you want to get the super special subscriber Nature Journal Prompt Card launch awesome freebie!!!!! Sign up now and an awesome nature journalling surprise will be in your inbox tomorrow!

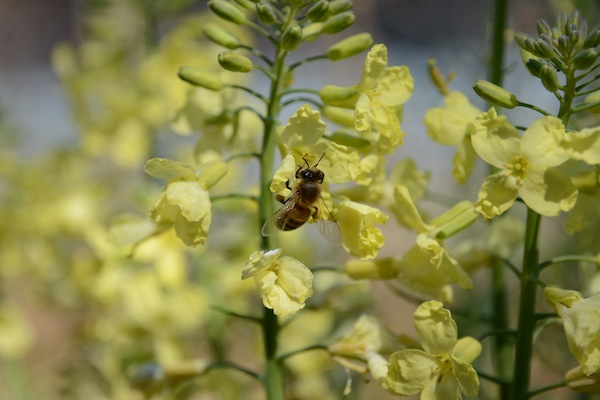
This lady knows when to harvest the broccoli! Pollen from its flowers that is!